🤖 Real-World Scenario: The Frustrated AI Developer
Imagine you're building a smart AI assistant for your company. It can summarize documents, look up customer info, and schedule meetings. You start by connecting it to a powerful large language model (LLM), but quickly run into roadblocks:
- The LLM doesn’t know your company’s data—it was trained before your latest product launch.
- You want it to call APIs (like scheduling or internal tools), but those have different protocols, formats, and security models.
- You find yourself writing glue code just to describe what tools are available, what they do, and how the model should use them.
You’re not alone. This is a common challenge when building AI-powered applications. You need a way to standardize how your AI talks to knowledge and tools, without reinventing the wheel every time.
This is where MCP (Model Context Protocol) comes in.
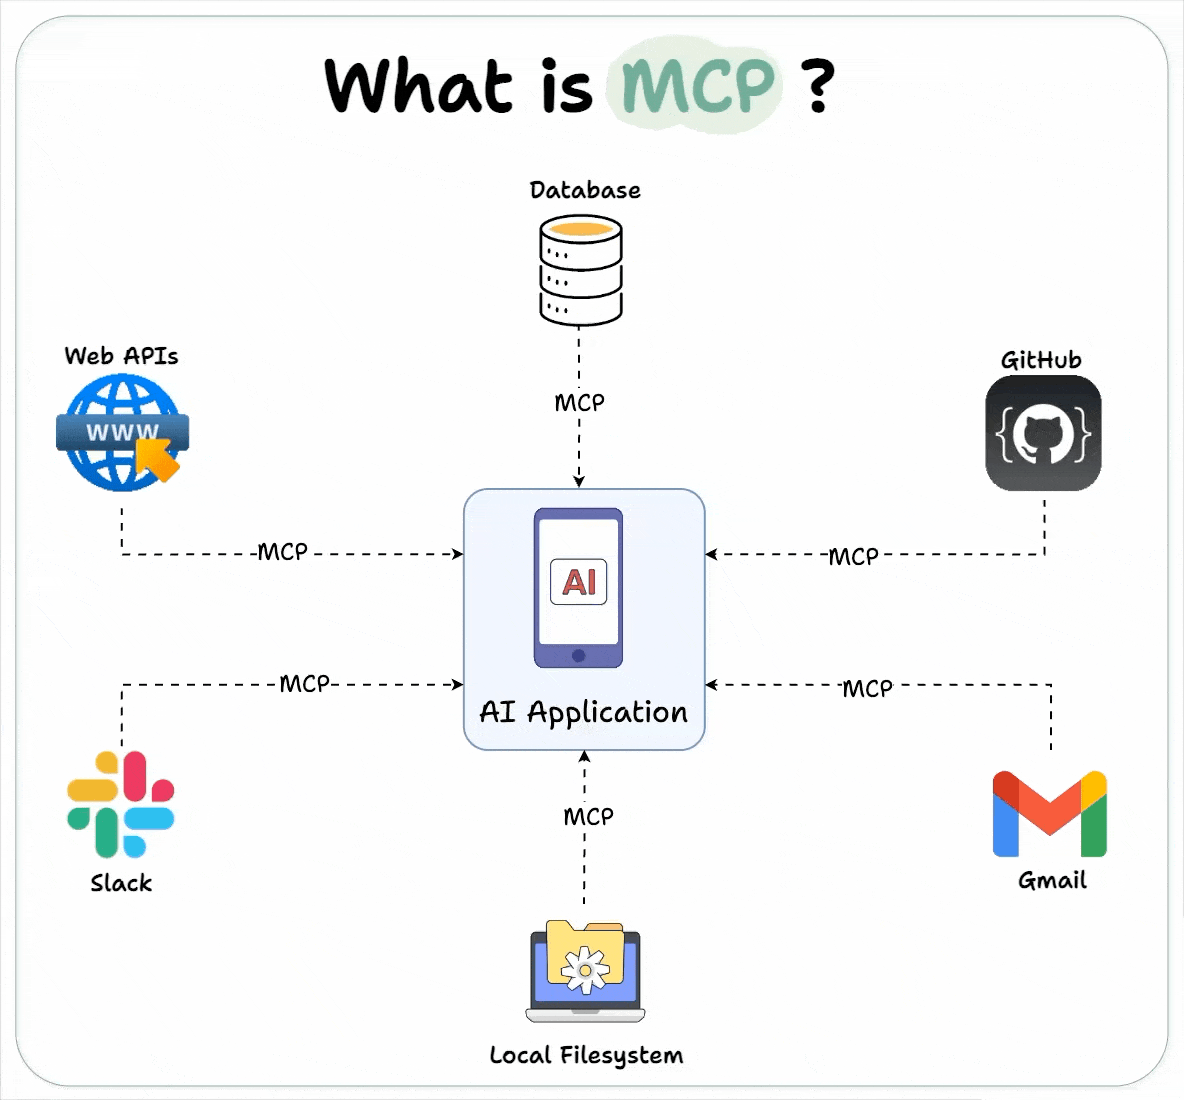
🧠 What Is MCP?
MCP (Model Context Protocol) is a standardized way for AI apps to talk to external tools, databases, and services—without worrying about their unique protocols.
It solves a core problem: LLMs don’t know everything and can’t take actions by themselves. MCP provides the missing layer that lets your app dynamically connect the model to the tools and data it needs.
🧩 How MCP Works
MCP uses a client-server architecture:
- MCP Client: Lives inside your AI application. It only speaks MCP.
- MCP Server: Interfaces with a specific tool or data source. It knows how to speak MCP and how to talk to the actual resource.
The client and server communicate via the MCP protocol, so your app only needs to learn one language.
Example
Your AI app wants to summarize a research paper stored in a private database.
- It sends a query to an MCP client.
- The client talks to an MCP server connected to your document database.
- The server retrieves the data, sends it back, and it’s included in the prompt to the LLM.
No custom glue code. No learning the database's weird API syntax.
🔍 Reflection & Discoverability
MCP servers can describe themselves to the app using a feature called reflection. This includes:
- The types of tools or resources they provide
- Sample prompts or formats
- Capabilities like data or function support
Your app can use this to auto-generate better prompts for the LLM—without manually writing descriptions.
🔐 Security & Deployment Options
MCP supports both local and remote servers, and includes modern security features:
- OAuth2 support for token-based authentication
- TLS encryption for secure remote calls
- Containerized formats for running servers locally
This gives developers flexibility while keeping enterprise-grade security intact.
⚙️ Why MCP Matters
Without MCP, AI developers must hand-code integrations between LLMs and external systems. That’s error-prone and hard to scale.
With MCP:
- You write once and connect many tools
- Your LLM becomes aware of what tools exist and how to use them
- You gain modularity, security, and reusability out of the box
📦 Real Use Cases
- An AI writing assistant querying internal style guides stored in a CMS
- A customer service bot calling APIs to fetch real-time order data
- A task planner LLM chaining tools to summarize, plan, and execute workflows
In all of these, MCP simplifies and standardizes how tools and data are plugged into AI workflows.
🧭 Final Thoughts
MCP isn’t just a technical framework—it’s a productivity unlock for AI development. It abstracts the mess of tool-specific logic into a single, well-defined protocol.
And if you're also building multi-agent systems where agents talk to each other, you’ll want to pair MCP with A2A (Agent-to-Agent protocol)—but that’s a post for another day.
Next time you’re building an AI feature that needs to "do something" or "know something," don’t reinvent the wheel. Reach for MCP and let your app talk to the world—intelligently.
Step-by-Step Instructions
1. Add the Remote
If you haven’t already, add the remote named origin:
git remote add origin https://github.com/mythkapo/ctrlk.git
If origin already exists and you want to change it:
git remote set-url origin https://github.com/mythkapo/ctrlk.git
2. Set the Upstream Branch
If your local branch is master (or main), set the upstream:
git push -u origin master
or, if your branch is main:
git push -u origin main
3. Verify the Remote
Check your remotes:
git remote -v
You should see:
origin  https://github.com/mythkapo/ctrlk.git (fetch)
origin  https://github.com/mythkapo/ctrlk.git (push)
4. Push and Pull
Now you can use:
git pull
git push
to sync with your GitHub repo.
Would you like me to run these commands for you?
If yes, ```